

Finding the perfect saddle is one of the most critical responsibilities of any horse owner or rider. A well-fitting saddle ensures not only the comfort and balance of the rider but, more importantly, the physical health and optimal performance of the horse. When a saddle doesn’t fit properly, it can cause severe pain, restrict the horse’s natural movement, and lead to long-term muscular or skeletal damage.
Important Note: A poorly fitting saddle is one of the leading causes of behavioral issues, resistance during riding, and chronic back pain in horses.
Whether you are a competitive equestrian or simply enjoy relaxed weekend trail rides, understanding the biomechanics of a good saddle fit is essential. Every horse has a unique confirmation that changes over time due to age, diet, and training levels, meaning that a saddle that fit perfectly six months ago might not fit today.
Why Check Your Saddle Fit Regularly?
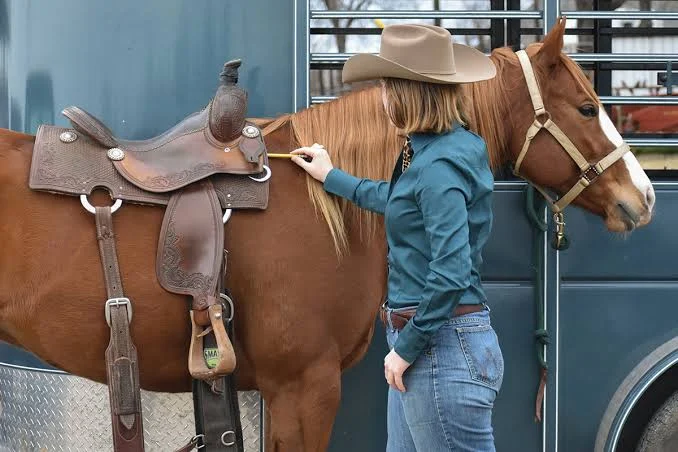
A saddle that fit your horse perfectly six months ago is not guaranteed to fit perfectly today. Horses are dynamic, living creatures, and their bodies constantly change shape and muscle tone over time. Assuming a saddle will fit for the entirety of a horse’s life is a common and dangerous misconception.
Regularly checking your saddle ensures you catch minor fit issues before they cause physical trauma. Below is a breakdown of the most common factors that cause a horse’s body shape to change:
| Factor | How It Affects Saddle Fit | Timeframe for Change |
|---|---|---|
| Seasonal Weight Fluctuations | Spring grass can lead to weight gain (widening the back), while harsh winters might cause a loss of condition (narrowing the back). | Months (Seasonal) |
| Training Intensity | An increase in consistent, correct work builds the topline muscles. Conversely, time off due to injury causes muscle loss. | Weeks to Months |
| Age and Growth | Young horses continue growing and developing until they are 6-8 years old. Senior horses often lose muscle tone and may develop a swayed back. | Years (Ongoing) |
| Dietary Changes | Adjustments in feed and forage directly impact the horse’s overall fat coverage and condition score. | Weeks |
Pro Tip: Aim to have your saddle checked by a qualified independent saddle fitter at least twice a year—ideally at the start of spring and the beginning of autumn.
7 Simple Checks to Carry Out on Your Saddle
Before you call a professional, you can perform a basic static saddle evaluation yourself. These checks should be done with the horse standing square on a hard, level surface. The saddle should be placed on the horse’s back without a saddle pad and ideally without the girth attached (or loosely girthed) to see how the saddle sits naturally.
These seven steps will help you identify immediate red flags in how the saddle interacts with your horse’s unique anatomy.
1. Check the Width of the Saddle – The Points of the Tree Against the Horse’s Back Shape
The most crucial aspect of saddle fit is the width and angle of the tree points. The tree points are the structural “legs” of the saddle located at the front, running down the sides below the pommel. They must lay parallel to the angle of the horse’s back just behind the scapula (shoulder blade).
To check this, lift the flap of the saddle and run your hand down the front panel to feel the hard structure of the tree point inside. Stand facing the front of the horse and assess how that angle matches the horse’s body.
How to interpret the tree point angle:
- ✅ Correct Fit: The angle of the tree points is perfectly parallel to the angle of the horse’s back. The saddle makes even, smooth contact.
- ❌ Too Narrow: The tree points are steeper than the horse’s back. The saddle will sit too high in the front, pinch the shoulders, and the pressure will be dangerously concentrated at the bottom edges of the tree points.
- ❌ Too Wide: The tree points are flatter than the horse’s back. The saddle will drop down in the front, putting severe pressure on the withers and restricting the shoulder movement.
2. Check Balance of the Saddle
The overall balance of the saddle determines how the rider’s weight is distributed across the horse’s back. A balanced saddle sits level, allowing the rider to easily find their center of gravity without fighting to stay in position.
To check the balance, step back and view the saddle from the side while it rests on the horse’s back without a pad. Look at the deepest part of the seat (the center point where the rider sits).
Assessing Saddle Balance:
- 🎯 Perfectly Balanced: The deepest part of the seat is completely flat and parallel to the ground. The rider’s weight will be distributed evenly over the bearing surface of the saddle panels.
- 📉 Pommel High (Tilted Back): If the front of the saddle sits too high, the deepest part of the seat shifts toward the cantle. The rider will be tipped backward into a “chair seat,” putting excessive pressure on the horse’s lower back and lumbar area.
- 📈 Cantle High (Tilted Forward): If the back of the saddle is too high, the deepest part of the seat is pushed forward. The rider will tip forward, tipping their pelvis into the pommel and driving the tree points directly into the horse’s shoulders.
Visual Trick: Place a completely round object (like a small ball or a lip balm tube) gently in the seat. If the saddle is balanced, the object should rest right in the center and not roll to the front or back.
3. Check Wither Clearance
The horse’s withers are highly sensitive, consisting of prominent spinal processes with very little fat or muscle for protection. A saddle must never touch the top of the withers, whether the horse is standing still or moving with a rider’s weight.
The “Finger Test” for Wither Clearance:
- Place the saddle exactly where it should sit naturally.
- Slide your fingers vertically between the pommel of the saddle and the top of the horse’s withers.
- You should ideally have 2 to 3 fingers of clearance (roughly 1.5 to 2 inches).
When to check wither clearance:
| Stage | Expected Clearance |
|---|---|
| Ungirthed (Standing) | 3 to 4 fingers |
| Girthed Tight | 2 to 3 fingers |
| With Rider Mounted | At least 2 fingers |
Warning: High-withered horses may naturally have less clearance, while flat-backed (mutton-withered) horses may have a massive gap. The most important rule is that the pommel never touches the bone, even when the horse lowers its head or lands from a jump.
4. Check Clearance at Sides of the Wither
While many riders remember to check the top of the wither, the sides are just as crucial and often overlooked. The muscles alongside the withers (the trapezius) need room to expand, and the shoulder blade (scapula) needs space to rotate backward as the horse strides forward.
To test this lateral clearance:
- Run your hand down both sides of the withers, sliding your flat palm between the horse and the front panels of the saddle.
- Your hand should slide smoothly without getting pinched or stuck.
- Ask a helper to lift the horse’s front leg and pull it gently forward (mimicking a stride). Keep your hand under the front panel. You should feel the shoulder blade slide back underneath the saddle without the saddle biting or heavily restricting the movement.
If there is insufficient space at the sides, the horse will inevitably shorten its stride to avoid the pinching pain, leading to a choppy, stiff gait and eventually muscle damage.
5. Check Sufficient Space Either Side of Spine at Rear of the Channel
The channel (or gullet) of the saddle runs directly over the horse’s spine. It is absolutely vital that the panels of the saddle rest securely on the strong back muscles (the longissimus dorsi) and never directly on the spine or the sensitive supraspinous ligament that runs alongside it.
To check the channel width:
- Stand directly behind the horse and look through the saddle’s channel. You should be able to see daylight all the way through to the front.
- Place your fingers horizontally across the channel at the rear of the saddle (the cantle area).
- The channel should be at least 3 to 4 fingers wide for the entire length of the saddle.
Crucial Warning: If the channel narrows significantly at the back, the panels will pinch the spinal ligaments. This causes severe discomfort, causing the horse to hollow its back, drop its belly, and refuse to step under itself with its hind legs.
6. Check Front of Panel for Blockages
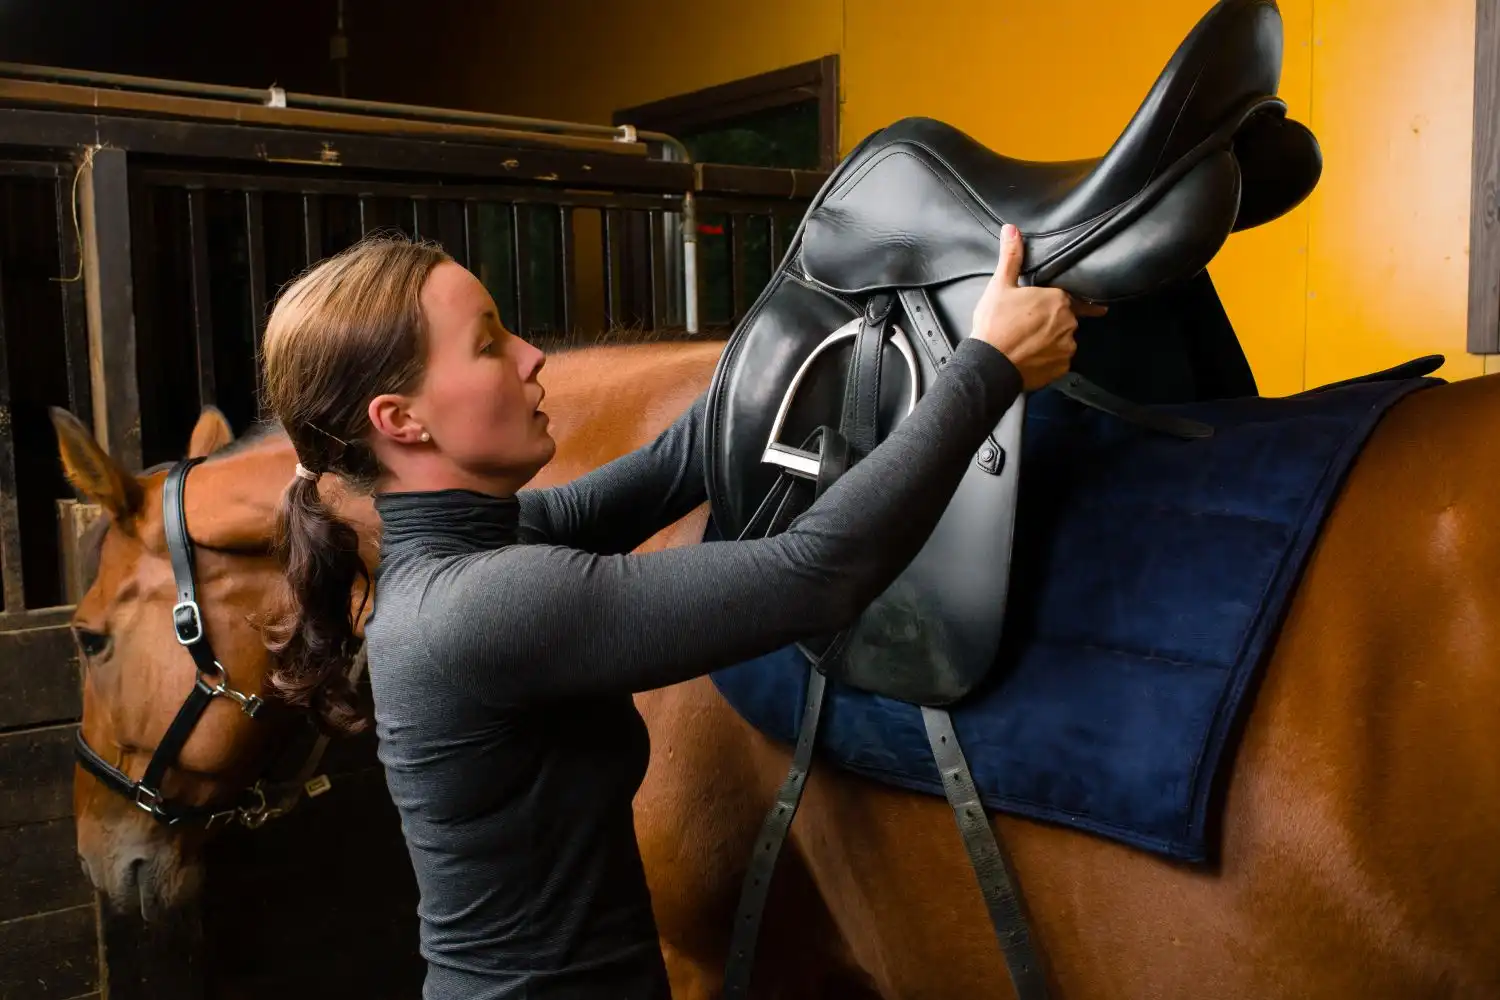
The panels are the cushioned underside of the saddle that sit against the horse. The flocking (stuffing) inside these panels needs to be smooth, symmetrical, and forgiving. Sometimes, saddles are over-flocked or the flocking becomes hard and lumpy over time, creating a physical “blockage” against the horse’s shoulder blades.
Run your hands firmly over the front panels on both sides to evaluate their condition.
Evaluating Panel Condition:
| Condition | What You Feel | Impact on the Horse |
|---|---|---|
| Ideal | Smooth, even, and slightly yielding (like a firm pillow). | Allows the shoulder blade to glide smoothly backward under the saddle. |
| Over-Flocked | Bulging, tight, and very firm. | Acts like a brick wall against the shoulder, severely restricting movement. |
| Lumpy/Uneven | Hard knots of flocking or hollow spots. | Creates painful pressure points and uneven weight distribution. |
| Asymmetrical | One panel is noticeably thicker or shaped differently than the other. | Pushes the saddle off to one side, causing rider imbalance and horse discomfort. |
7. Check for Bridging/Lightness Under the Saddle Panels
For a saddle to fit comfortably, it must have even, continuous contact along the horse’s back. When a saddle does not trace the anatomical curve of the horse’s back, two main issues occur: bridging or rocking.
To test for even contact, place your non-dominant hand lightly on the center of the saddle to apply a little pressure. With your dominant hand flat, slide it underneath the panel along the horse’s back from the front (pommel) all the way to the back (cantle).
Pay attention to the pressure on your hand:
- ✅ Even Contact: The pressure on your hand feels consistent from front to back.
- ❌ Bridging: You feel tight pressure at the front and back, but a “hollow” or light space in the middle under the rider’s seat. This is dangerous because it concentrates the rider’s entire weight on four small points (two in front, two in back) rather than spreading it evenly.
- ❌ Rocking (Lightness at ends): The saddle presses firmly in the middle but is loose at the front and back. The saddle will rock like a seesaw when the horse moves, causing friction and instability.
What Else on Your Saddle Should You Check?
While how the saddle fits the horse is your primary concern, the structural integrity and safety of the saddle itself are just as important. A saddle that is falling apart can become a sudden safety hazard for the rider and a source of pinching or uneven pressure for the horse.
Make it a habit to inspect these key components every time you clean your tack:
| Component | What to Look For | Why It Matters |
|---|---|---|
| The Tree (Internal Frame) | Hold the pommel and cantle and apply pressure. Listen for squeaking or excessive bending. | A broken tree is severely painful for the horse and completely ruins the weight distribution. The saddle must be replaced or rebuilt. |
| Girth Straps (Billets) | Check the holes for stretching, tearing, or cracking leather. Check the stitching attaching them to the saddle. | If a billet snaps while riding, the saddle will slip completely, posing a massive fall risk for the rider. |
| Stirrup Bars | Ensure the metal is not bent or rusted. Check that the safety catches (if applicable) open and close smoothly. | Faulty stirrup bars can trap a rider’s foot during a fall or cause the stirrup leather to detach unexpectedly. |
| Leather and Stitching | Look for dry rot, deep cracks, or unraveling threads, especially around the seat and flaps. | Maintains the overall lifespan of the saddle and prevents sudden equipment failure. |
Safety Reminder: Leather requires hydration to stay strong. Regular conditioning not only keeps your saddle looking beautiful but also prevents the leather from becoming brittle and snapping under tension.
Conclusion
Achieving the perfect saddle fit is not a one-time event; it is an ongoing journey of observation, adjustment, and care. Your horse cannot speak, so it relies on your vigilance to ensure its tack is comfortable. By performing these seven simple checks regularly, you can catch minor weight fluctuations and muscle changes before they evolve into chronic pain, behavioral resistance, or costly veterinary bills.
Remember that while you can (and should) evaluate your saddle yourself, nothing replaces the trained eye of an independent, certified saddle fitter. Use your basic checks to monitor the situation, but always consult a professional when it’s time to make adjustments, reflock panels, or purchase a new saddle. A comfortable horse is a happy, willing, and athletic partner!
FAQs About Fitting a Western Saddle
1. What does “gullet width” mean in a Western saddle, and how do I choose?
The gullet width determines how the saddle sits over the horse’s withers and shoulders. Standard sizes include Semi-Quarter Horse (narrower, higher withers), Quarter Horse (average), and Full Quarter Horse (wide, mutton withers). You must choose the width that matches your horse’s skeletal structure to prevent pinching or pressure sores.
2. How can I tell if the “bars” of my Western saddle fit correctly?
The bars are the underside pieces of the tree that rest on the horse’s back. They should have flush, even contact along the horse’s back without bridging (hollow in the middle) or rocking (tight in the middle, loose at the ends). You can check this by running a flat hand beneath the saddle while it’s resting loosely on the horse.
3. Will adding a thicker saddle pad fix a poorly fitting Western saddle?
No. A saddle pad is designed to provide shock absorption, wick away sweat, and protect the leather—not to correct a bad fit. If a saddle is too narrow, adding a thick pad is like wearing extra-thick socks with shoes that are already too tight; it only makes the pinching worse.
4. Where exactly should a Western saddle be placed on the horse’s back?
A Western saddle should be placed so that the front edge of the rigid tree bars sits just behind the horse’s shoulder blade (scapula). Placing it too far forward traps the shoulder and restricts movement, while placing it too far back puts weight on the weak lumbar area.
5. What is “flare” in a Western saddle tree?
Flare refers to the slight outward curve at the very front and very back of the saddle bars. Front flare allows the horse’s shoulder blades to slide backward underneath the saddle without hitting a sharp edge. Rear flare prevents the back of the bars from digging into the horse’s loins during sharp turns or sliding stops.
6. Can the tree of a Western saddle be adjusted if my horse changes shape?
Unlike many modern English saddles that feature interchangeable gullets or adjustable flocking, traditional Western saddles are built on solid wooden or fiberglass-covered trees. They generally cannot be adjusted. If your horse drastically changes shape, you will likely need a different saddle.
7. How do I know if the skirt of my Western saddle is too long?
The skirt (the large leather base of the saddle) should not extend past the horse’s last rib into the sensitive hip or lumbar region. If the skirt is too long, it will rub against the point of the horse’s hip when they turn or bend, causing discomfort and limiting their flexibility. Short-backed horses often require “round skirt” Western saddles to avoid this issue.